
I finished installing my grasscloth wallpaper in our bedroom suite last Thursday, so I’ve had a weekend to live with it. I’ve had three days to look at it, live with it, and be surrounded by it, and I love it more and more with each passing day. There’s nothing like grasscloth wallpaper to add natural texture to your walls, but installing grasscloth wallpaper is a bit different from hanging regular wallpaper. It’s not difficult to install, especially if you’ve had experience hanging regular wallpaper, but there are some tips and tricks that I learned along the way. So today, I want to share how to hang grasscloth wallpaper, start to finish, and share those tips and tricks that I learned along the way.
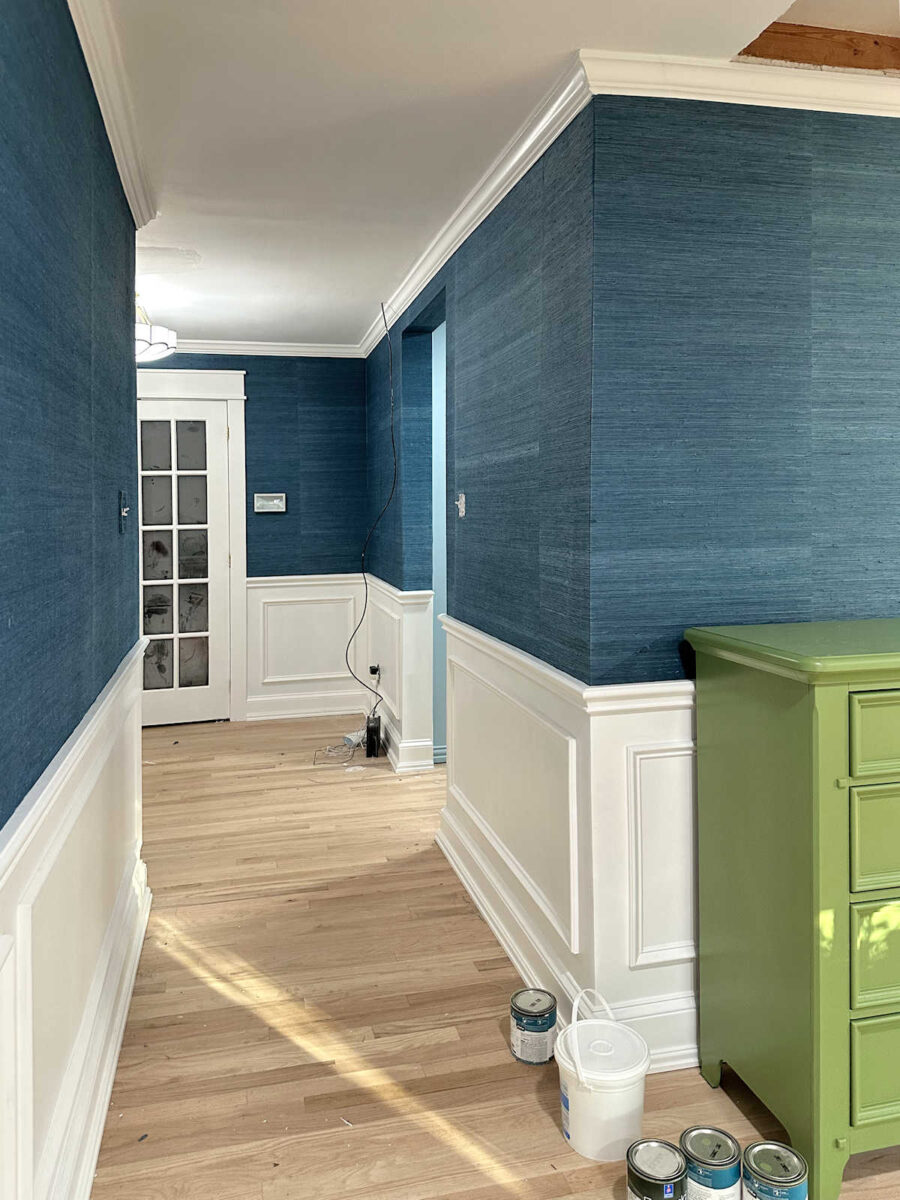
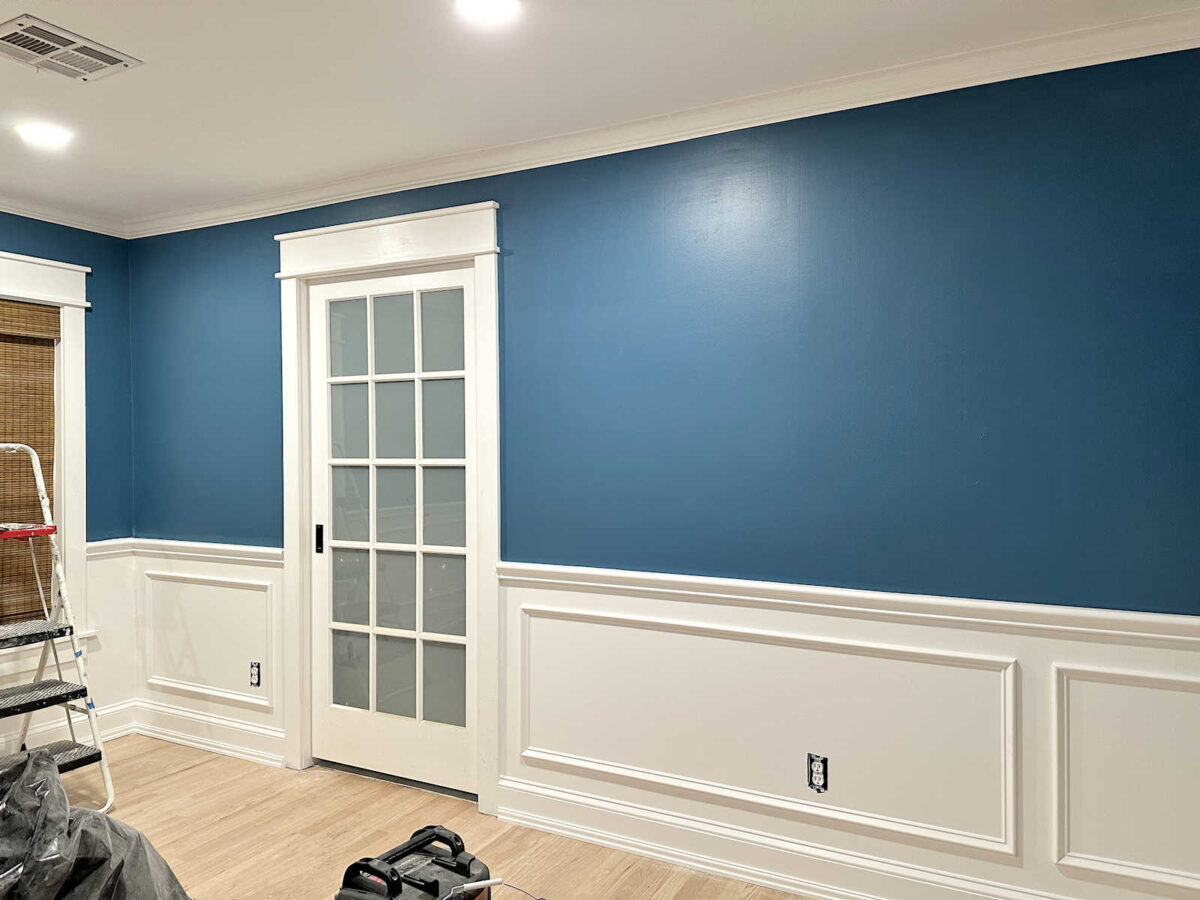
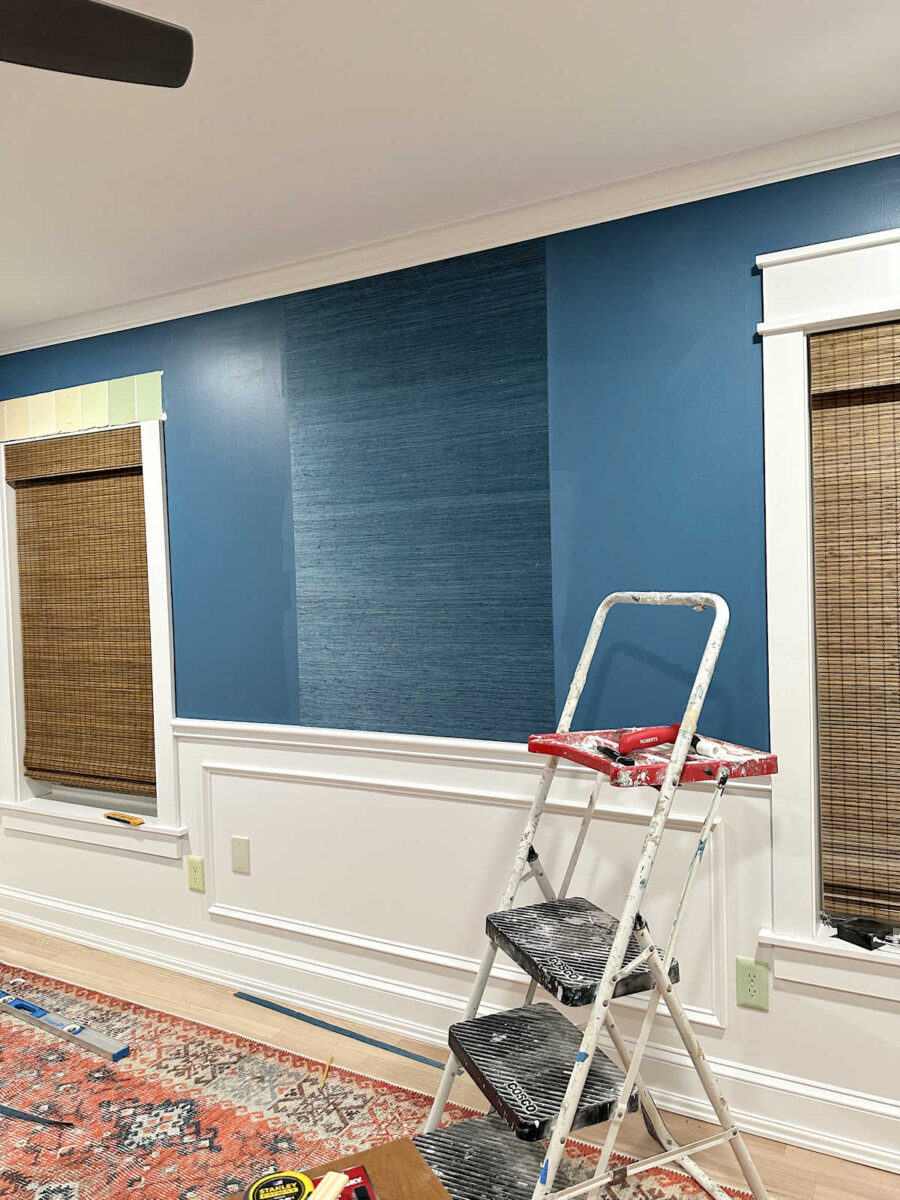
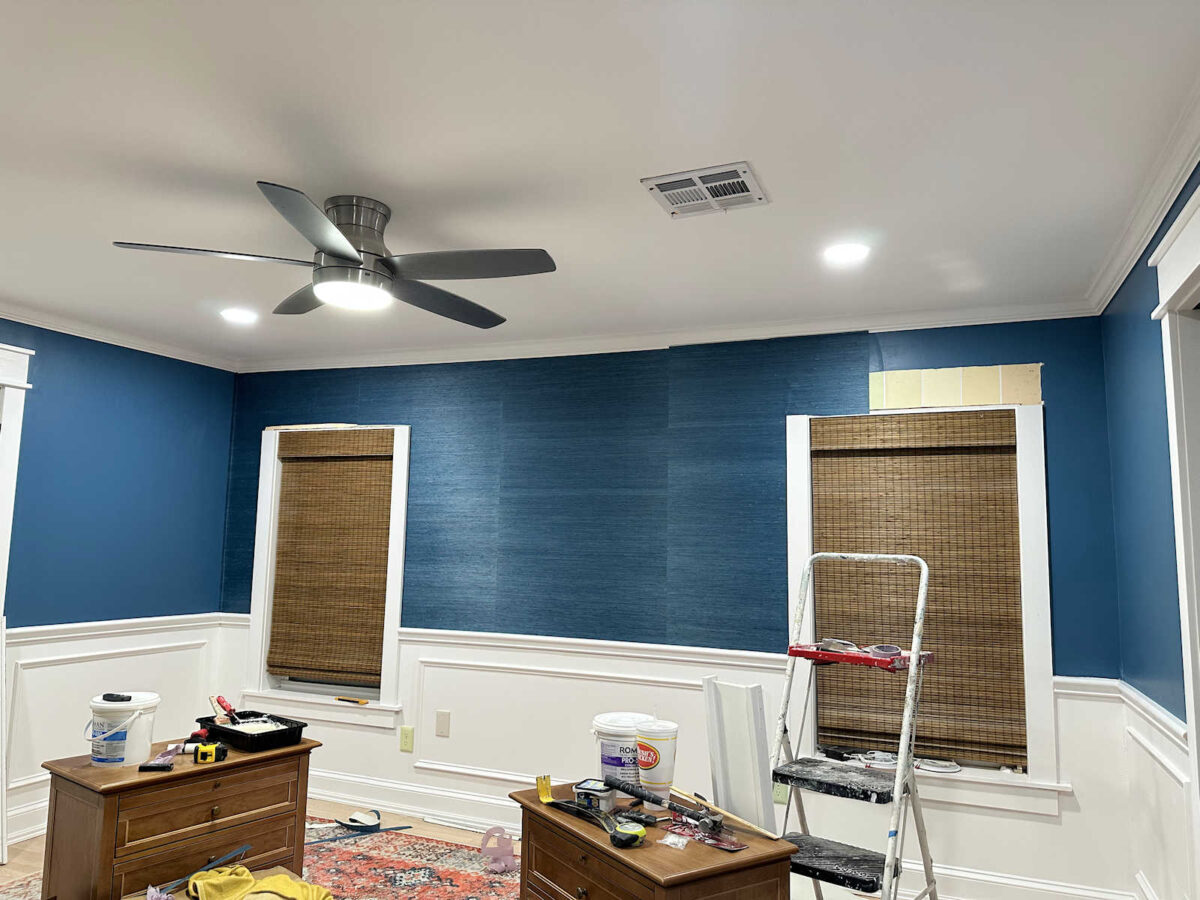
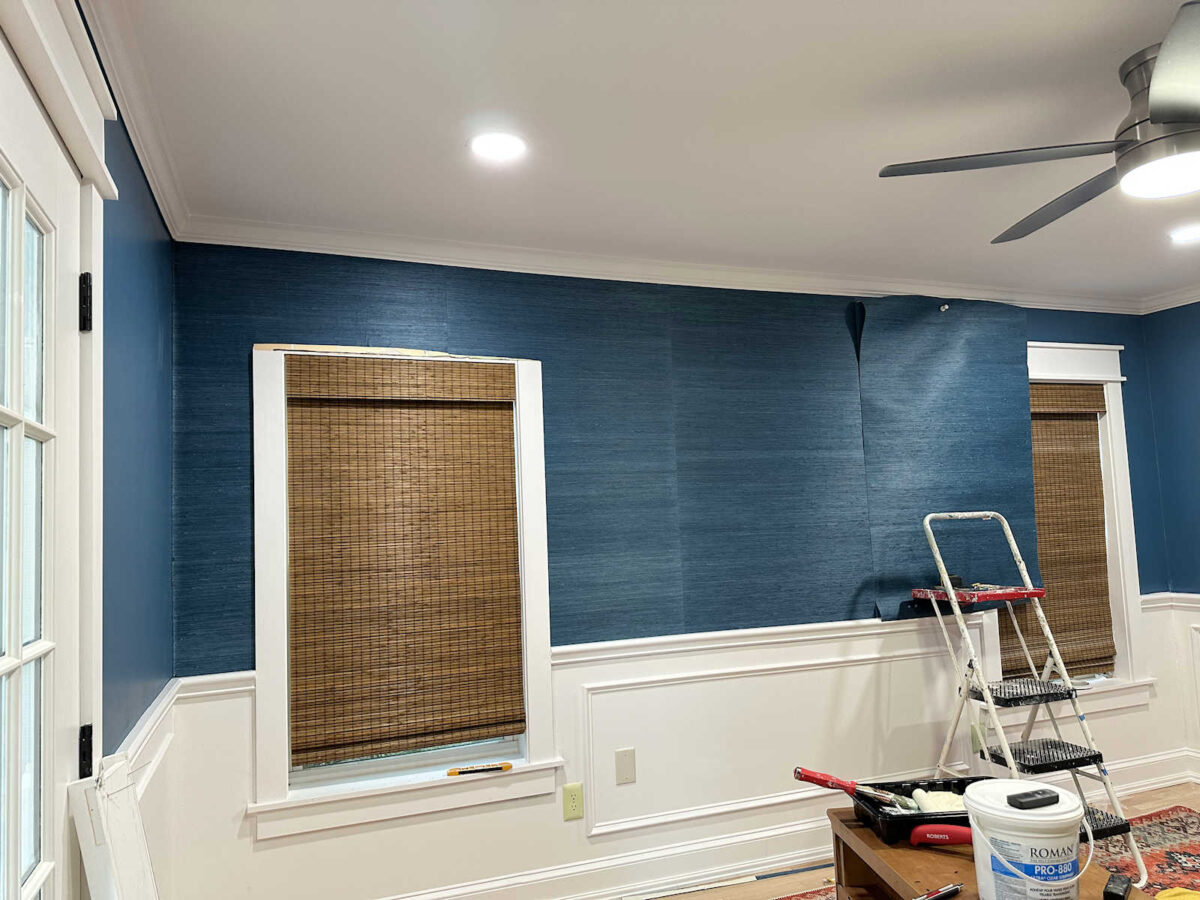
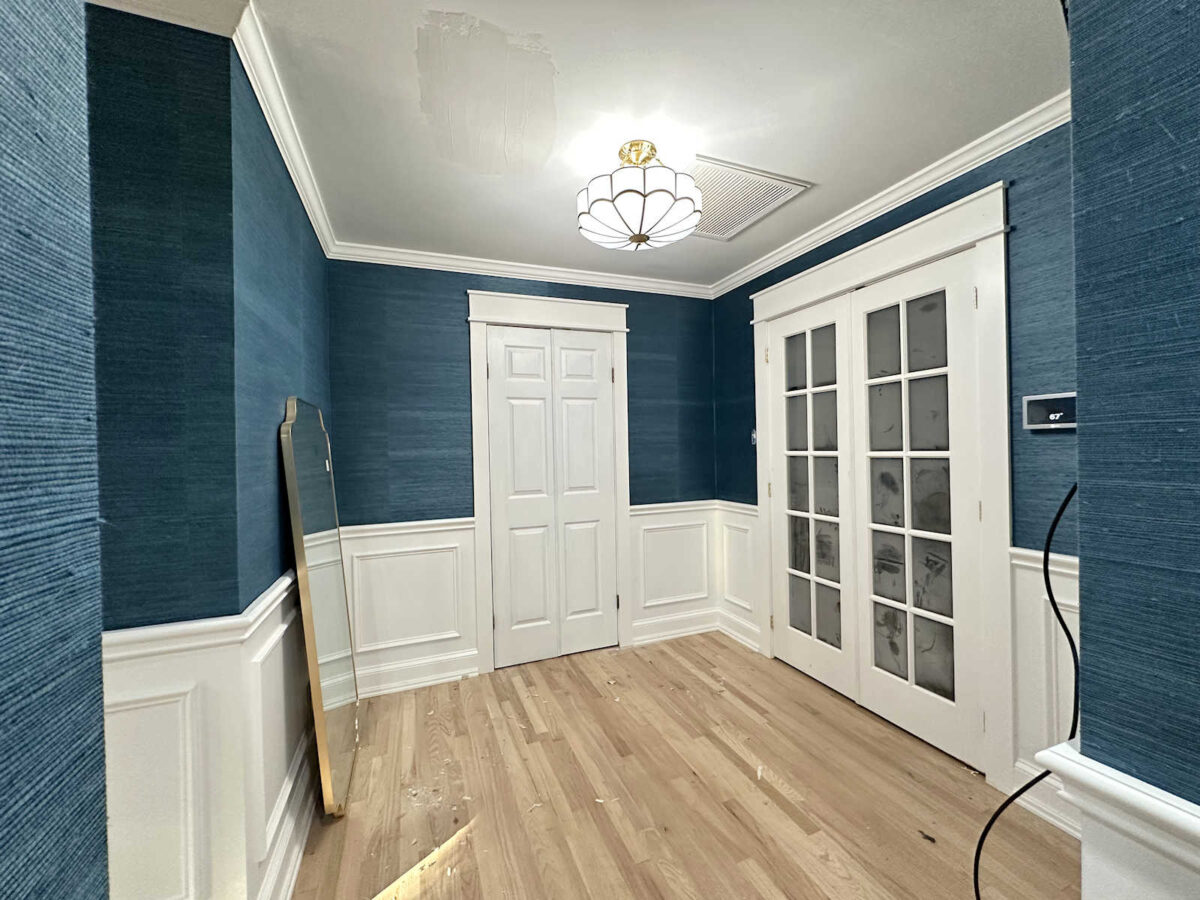
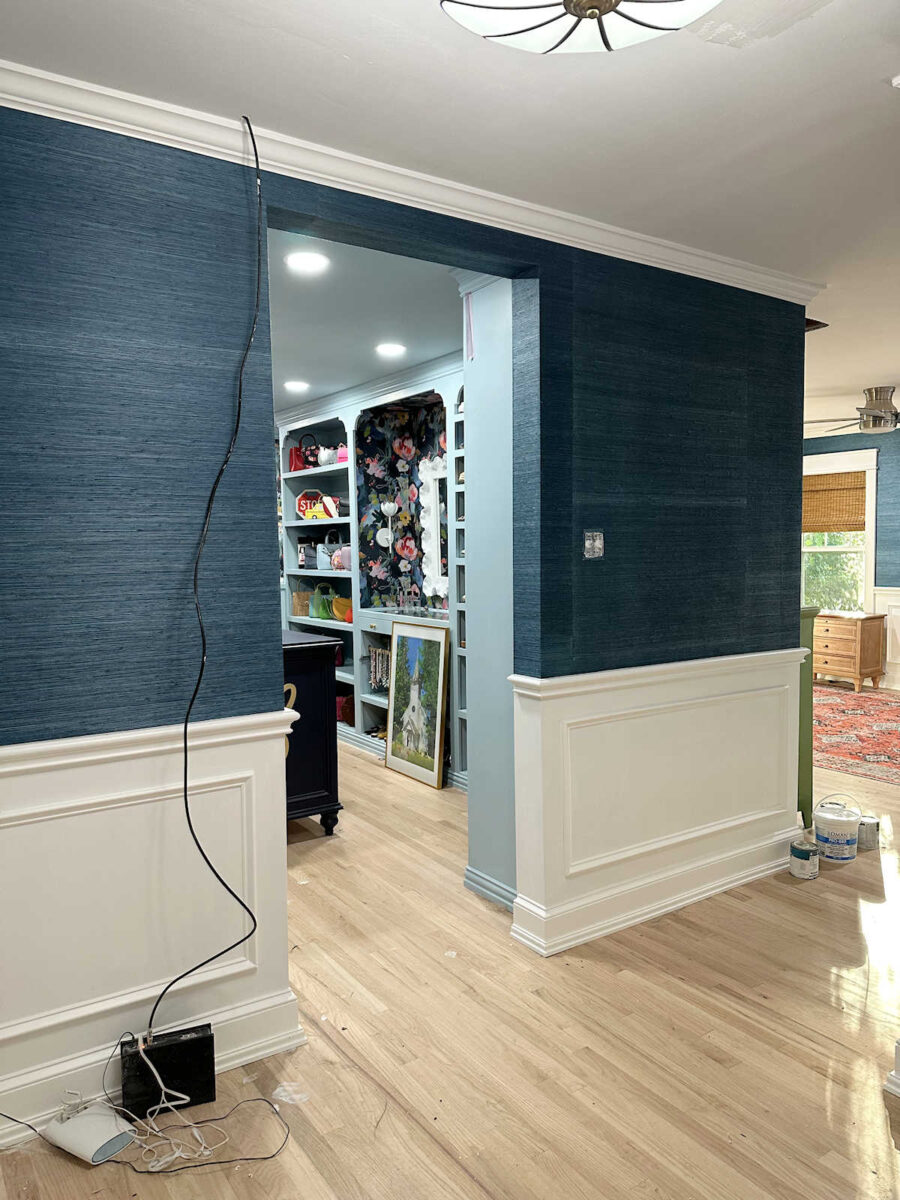
But first, let’s just take another look at these amazing walls. Y’all, I seriously can’t get enough of this dark teal.
There’s simply no way to get this kind of look with paint. Grasscloth is a totally unique look that can’t be replicated (and I’ve tried!)
So let me start at the beginning and share the whole process.
1. Paint the walls to match the grasscloth.
I took a piece of the grasscloth to Home Depot and had it color matched in their Behr Premium Plus paint. I tried to match it to the darkest color in the grasscloth. And then I painted the walls with that color. After painting, I gave the walls about 3-4 weeks so that the paint could cure completely, so this took some planning ahead. If you don’t want to wait that long, I’ve heard that there are primers made specifically for use with wallpaper that can be color matched to your wallpaper and that don’t take nearly as long as latex paint to cure.
One thing I did that I think made a huge difference is that I painted this little bottom edge of the crown molding the same color as the walls.
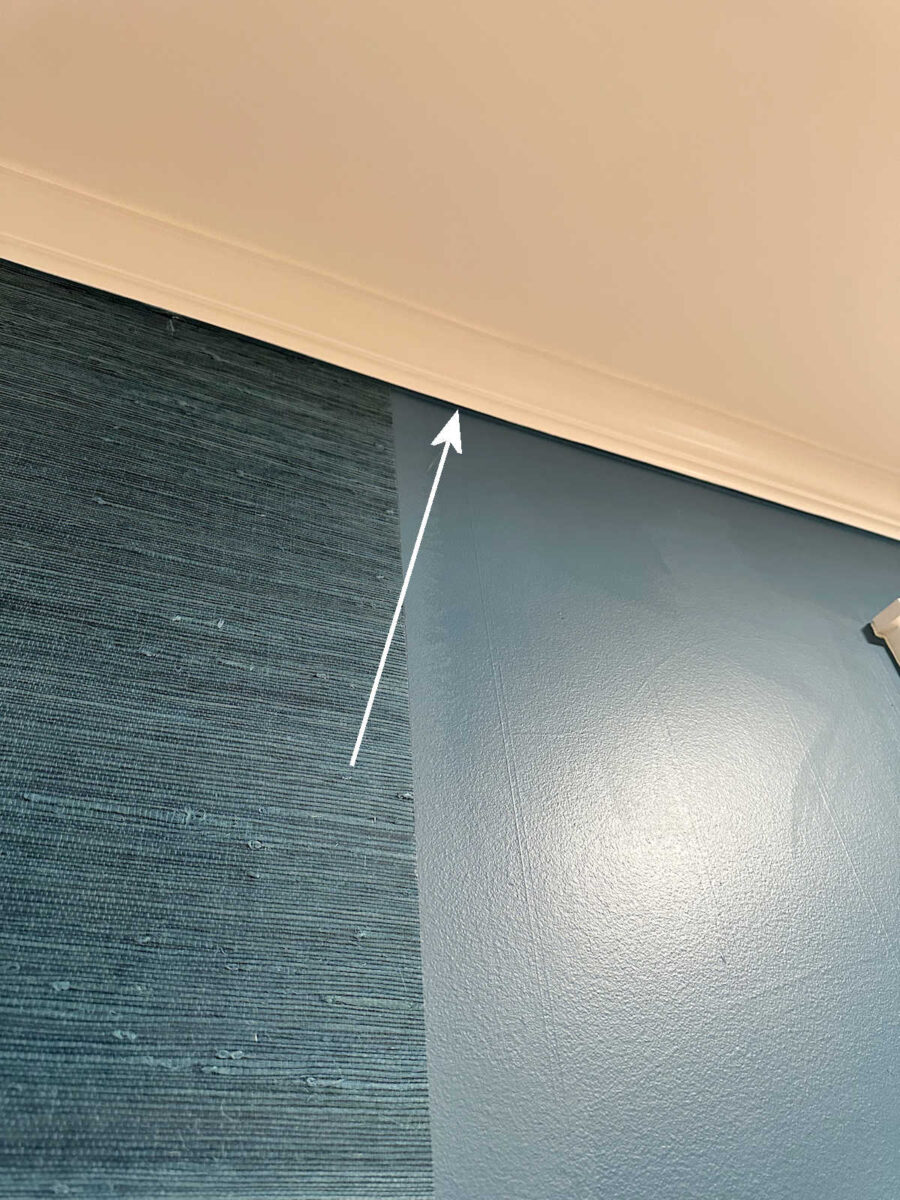
This isn’t as tedious as it may sound. I just used a normal paint brush and painted it on somewhat carefully but quickly, and then used a wet rag to wipe off any paint that got on the face of the crown molding. I did this at the same time I did the cutting in along the top of the walls with the wall color, and it actually went very quickly. But having this little bottom edge the same as the wall color gave me a really sharp and clean contrast between the grasscloth color and the white crown molding.
2. Cut, mark, and number the pieces of grasscloth.
Since I was only doing the upper part of the walls with wallpaper, I had already figured how many pieces I could get out of each roll of wallpaper. I cut one roll at a time, five pieces from each roll, and I numbered the pieces as I cut them and marked the top edge of each piece with arrows so that I knew which end was up and which end was down.

You really don’t need a lot of tools for hanging grasscloth wallpaper. I used a 6-inch roller with 1/4-inch nap roller covers (marked for smooth surfaces), a roller for seams (found in the flooring department of Home Depot), a straight edge (I used a 10-inch mudding knife), and a utility knife. I used the kind with the snap-off blades because you’ll go through a lot of blades installing grasscloth. In fact, I used one blade per sheet of grasscloth, and then snapped that one of and started with a new blade for each new sheet of wallpaper.

In addition to what’s shown above, I also kept a wet rag on hand just in case I got any adhesive on the grasscloth so that I could wipe it off immediately. And I also used a 2-inch Purdy sash brush (any high quality paint brush will do) to apply the adhesive along the crown molding, the chair rail, and the previously installed piece of wallpaper. And of course, I needed a 7-inch paint pan to pour the adhesive into.
4. Select your adhesive.
I watched a lot of videos and read a ton of comments on those videos to find the right adhesive for installing grasscloth wallpaper. I started off using Roman Pro-880, which seems to be a favorite for most pros. But pros work really fast and have lots of experience. I found that for me, as a novice in hanging grasscloth wallpaper, it didn’t have enough tack to it to hold the weight of the paper up long enough for me to get it just right (since grasscloth is heavier than standard wallpaper), and it also didn’t hold the seams down enough for my liking. I didn’t like having to go back and babysit the seams, making sure to press them down repeatedly until the adhesive dried enough to hold them down.
So I swapped and went with my personal favorite, Roman Pro-555 Extreme Tack. This is my go-to for standard wallpaper installation. It’s strong enough to hold the heavy paper on the wall without it coming down on your head as you’re positioning it, and it also does a beautiful job at holding the seams down immediately. But it still gives you enough working time if you need to adjust the piece or completely remove the piece and reapply it.

Now here’s the thing. The instructions on the Pro-555 Extreme Tack say very clearly DO NOT ADD WATER. But I’m not very good at following instructions, and I always add water to mine. The Pro-555 is so thick that it’s almost too thick, and I find that adding just a tiny bit of water (no more than 1/8 cup/30 ml.) per gallon. I find that that’s just enough to stir the gallon of adhesive and get a good, smooth consistency without destroying that “extreme tack” quality of the product. But again, do this at your own risk because the instructions clearly say NOT to add water. I’ve done it every single time I’ve used this product, and I’ve never had an issue with it, but if you do it, just know that it’s clearly the opposite of what the manufacturer recommends.
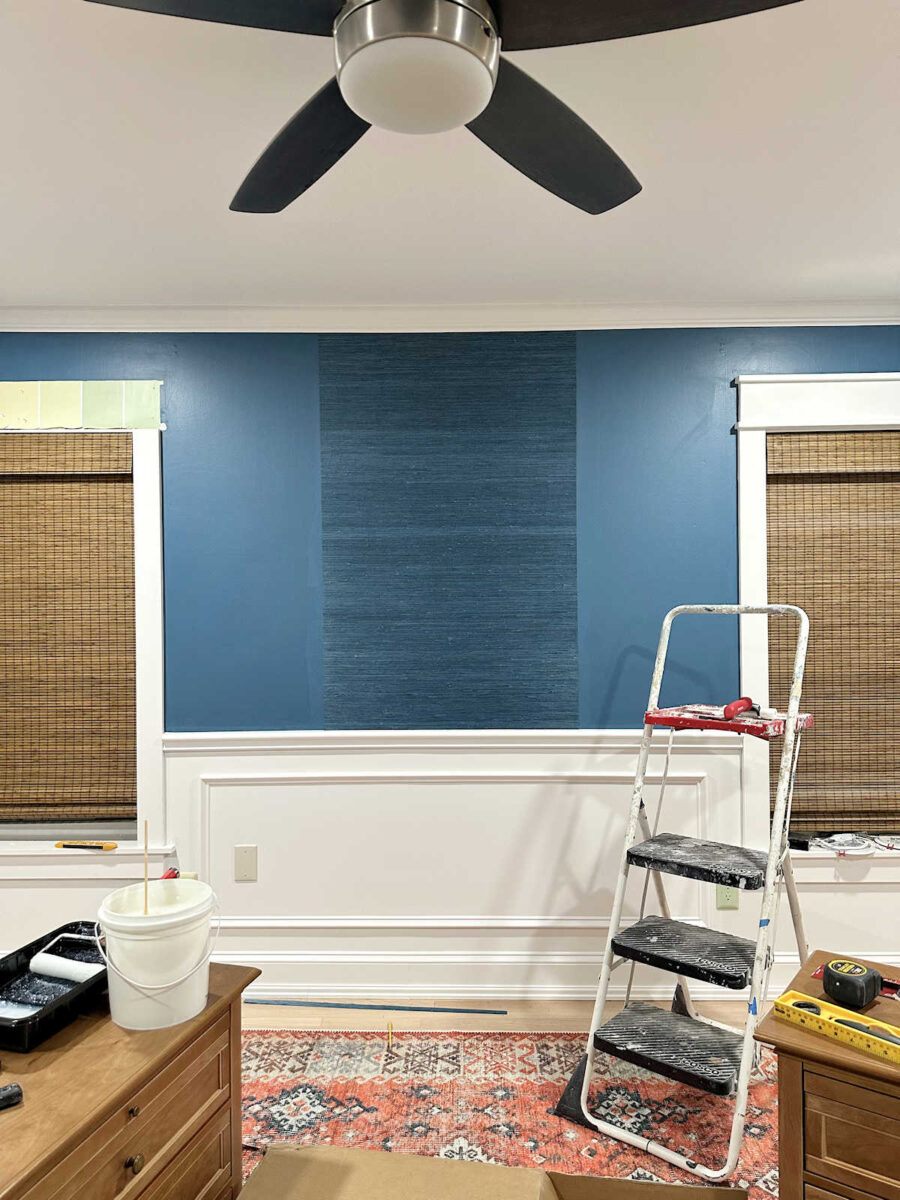
5. Carefully choose your starting point.
Because the seams in grasscloth are visible, you do have to be very conscientious of where to start. If you’re only doing one feature wall, you want to be sure that the paper is centered on that wall. You’ll either want a seam right in the middle or you’ll want a full sheet centered in the middle. Having your grasscloth off-center on a feature wall will be very noticeable. If you’re doing a whole room, think about which wall will be the feature wall in the room, center the paper on that wall, and work out from there.
In our bedroom, the headboard wall is obviously the focal wall of the room, so I started with one piece centered in the middle of that wall and then worked out from there. I had already measured and figured that this wall required five pieces, and I could get five cuts from each roll of wallpaper. And since I was starting in the middle, I started with the piece marked #3 from that roll. I applied the adhesive to the wall (not the back of the paper), using my paint brush to get the adhesive along the crown molding and the chair rail, and then I rolled the adhesive onto the middle portion of the wall. I had already measured and marked the width of the first piece on the wall so I knew how wide to go when rolling the adhesive. And then right before I put the paper on the wall, I wiped down the back of the wallpaper with a wet rag just to soften it a bit and make it a little easier to work with.
And then I worked out from there, with pieces #2 and #1 going to the left of that first piece, and pieces #4 and #5 going to the right of that first piece.
6. Decide if you want to work around or remove trim
I decided to remove the top header trim pieces on all of the doors and windows instead of trying to cut around them. But I left the vertical pieces since it was easy to cut straight lines against them. If all of your trim is straight with square corners, it’s easier to leave the trim up. If your trim is irregular or you have fancy trim above your doors and windows, it might be easier to remove it, install the wallpaper, and then reattach the trim.
7. Mark plumb lines for each new piece.
If you have a laser level, this process will be easier and this step will be unnecessary. But I don’t have a fancy laser level, so before installing each subsequent piece, I measured and marked the width of the next piece from the previous piece.

And then I used my bubble level to mark a plumb line on the wall as a guide for the next piece.

8. Using the “paste the wall” technique
I decided to paste the wall instead of the back of the paper because I felt like I had more control over it. So I used my paint brush to carefully add paste next to the previous piece of wallpaper…

And then I added paste along the crown molding and the chair rail…

And then I rolled the adhesive onto the center portion of the wall.

And as I mentioned above, before hanging the wallpaper, I used a wet rag to moisten the back of the wallpaper and then attached it to the wall.
I mainly used my hands to smooth out each piece, making sure that there were no air bubbles trapped underneath, and making sure to smooth out any wrinkles. I did not use the roller on most of the pieces. Again, my hands were my main tools for smoothing out the paper and pressing the seams into place. I only used the roller if I had any stubborn bubbles or stubborn seams, and I used the roller very selectively only on those stubborn areas.
9. Reverse hang the wallpaper.
When installing solid color grasscloth wallpaper, you’ll want to reverse the direction of each piece. In other words, start with your first piece going up (remember those arrows I drew on the back of each piece?). And then the next piece will be installed with those arrows going down. On the next piece, the arrows will go up, and the next piece will go down. Continue this until the whole area is covered.
10. Trimming the paper
I trimmed the paper immediately rather than waiting for it to dry before trimming. To do this, I used my 10-inch mudding knife to make sure that the paper was firmly adhered right down the top edge of the chair rail, and the I kept the mudding knife in place to use as a guide for cutting the paper.
When cutting the paper, you don’t want to cut on the side of the mudding knife next to the wall. You risk tearing the wallpaper if you cut on this side.

Instead, you want to cut on the side between the mudding knife and the trim.

I also used the mudding knife to push the wallpaper into the corners to get really sharp creases in the corners. To do this, I pressed pretty hard into the corners. Grasscloth doesn’t like to fold this way, so it takes quite a bit of pressure to get that sharp crease.

And then I lifted up on the knife, repositioned it a few inches up, and did the same thing until I had worked my way all the way to the top.

In other words, I didn’t slide the knife up the wallpaper. If you slide the mudding knife up the corner while keeping pressure, you risk the corner of the knife catching on the wallpaper fibers and ripping it. Ask me how I know. 🙂
At the bottom and top corners, I pressed my mudding knife right into the corner and folded the wallpaper like shown below to get the wallpaper right into the corner where it met the bottom trim.

And then I pulled the wallpaper away from the wall, cut away the excess, and pressed the wallpaper back into the corner.

Removing that bulk from the corner allowed me to trim the bottom just like normal while getting right into that corner very easily without having to deal with extra bulk.
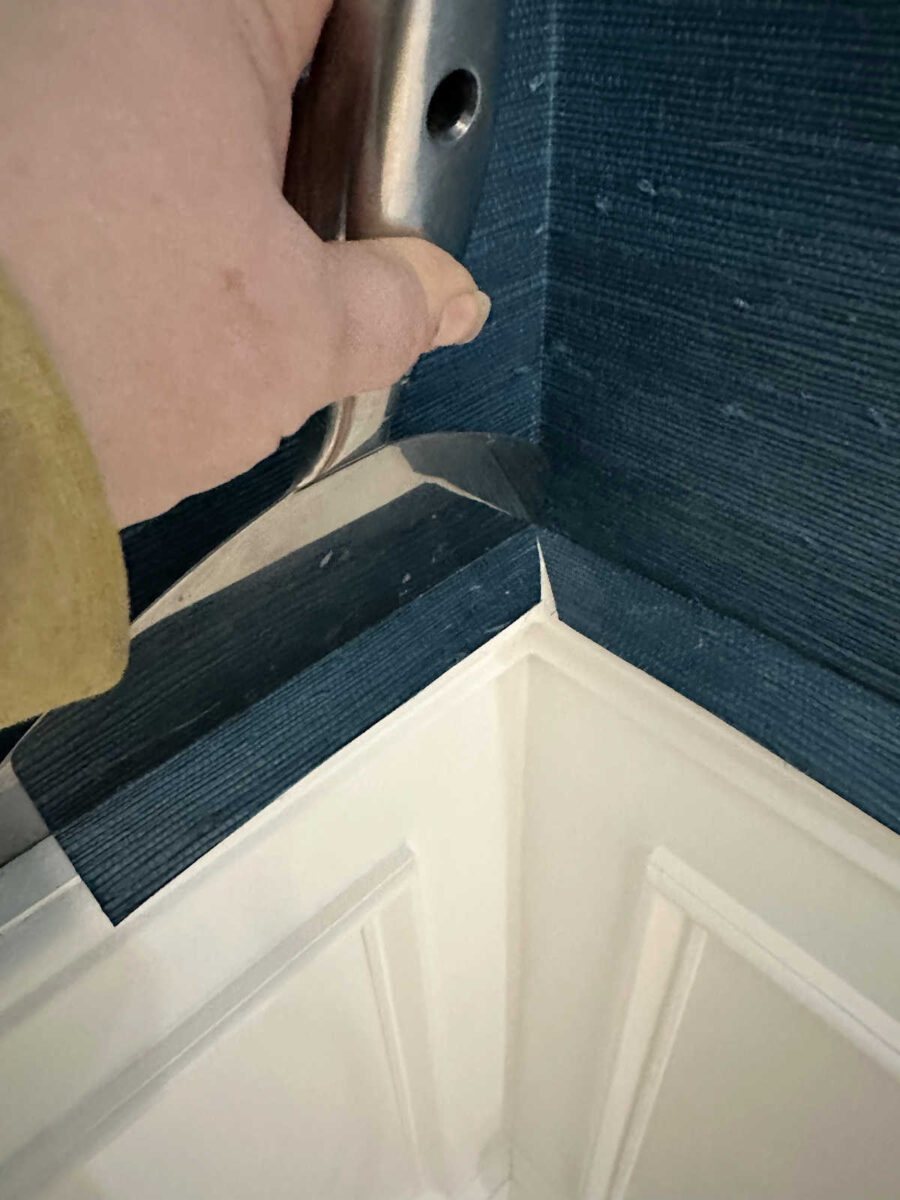
And here’s the finished corner once it was trimmed…

I did the top corners in the exact same way — fold the wallpaper carefully so that the knife can get all the way into the corner, pull the paper away and trim away the excess, press the wallpaper back into the corner, and then trim as normal.

11. Working around challenges and piecing together wallpaper
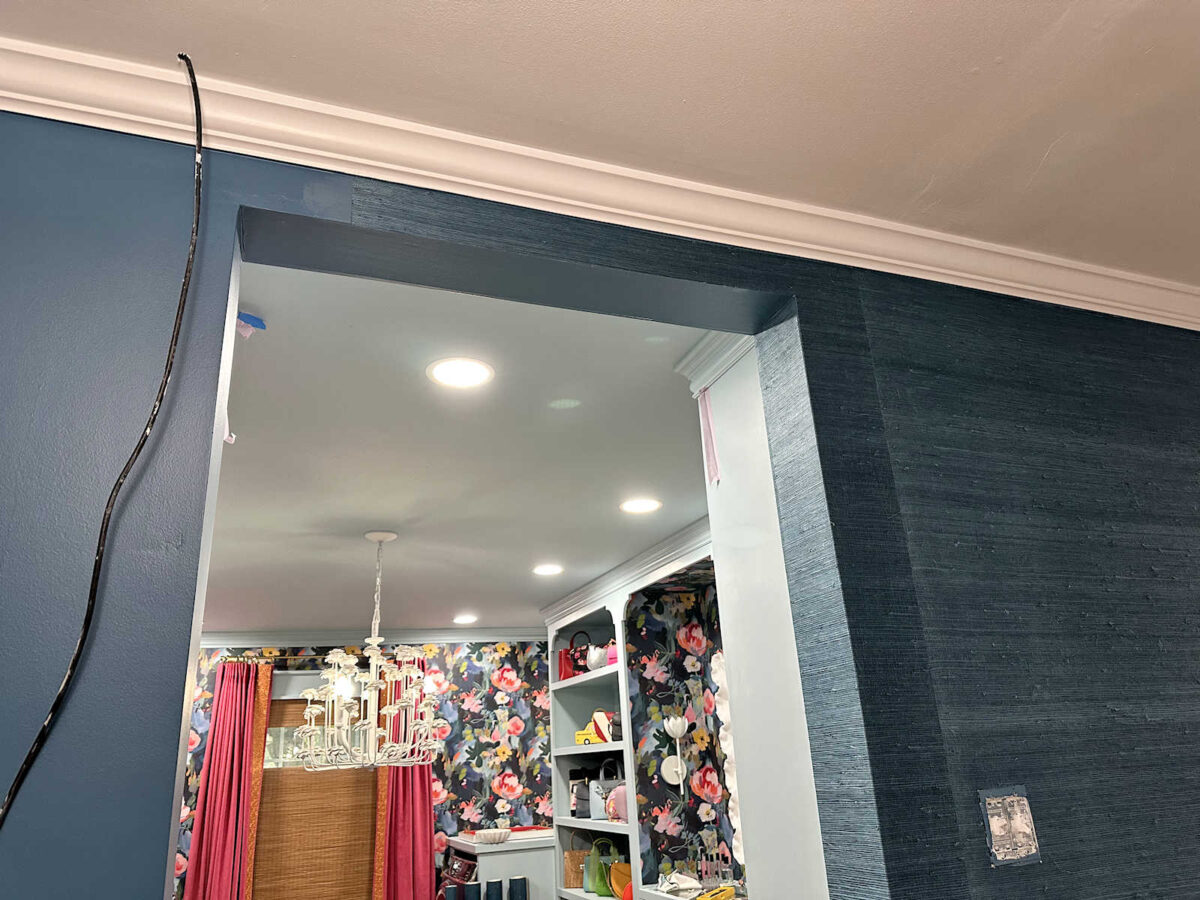
I can’t anticipate or address every challenge that you may come across while installing grasscloth wallpaper, but I’ll share this one challenge that I ran into. My closet doorway doesn’t have trim around it, and I wanted the grasscloth to wrap around to the door jambs.
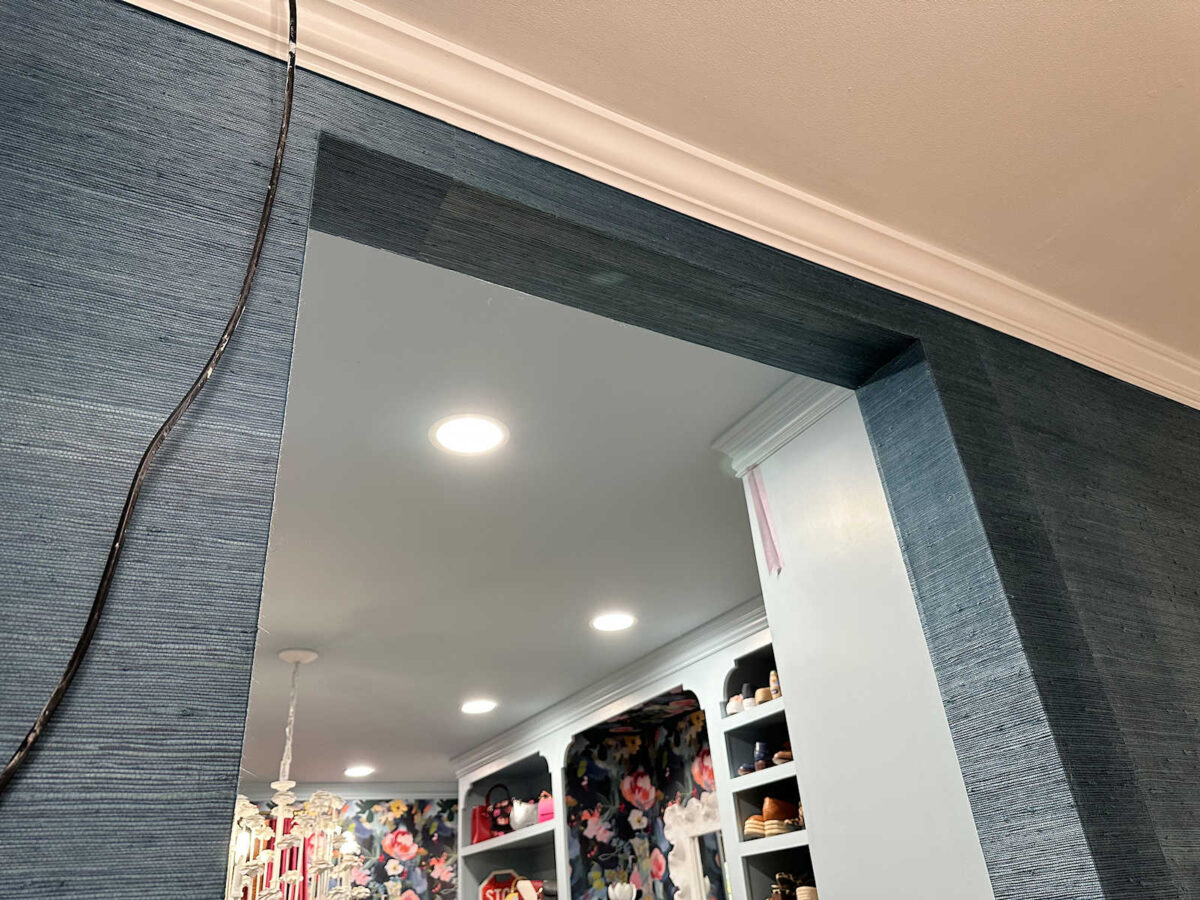
It seemed simple until I started working on it, and then I realized that I couldn’t wrap the paper around both the side jamb and the top jamb. Since seams are so visible on grasscloth, it was imperative for me to maintain my 36-inch widths. But by maintaining those 36-inch widths, that meant I could only wrap the wallpaper onto the top jamb, or I could wrap it onto the side jamb, but I couldn’t do both with one sheet of wallpaper. Obviously, I chose to wrap it onto the side jamb since those are bigger and more visible, but that left me with only partial coverage for the top jamb. So I ended up trimming the grasscloth along the edge, leaving the top jamb completely uncovered in this step.
I went ahead and hung the next piece of wallpaper to the left of that one, and I did the same thing — wrap the side jamb of the doorway with the grasscloth and cut away what was left of the excess right at the corner of the top jamb. And then I went back with separate pieces and covered the top jamb, maintaining the seams where the two main pieces meet so that it looks like the wallpaper is seamlessly wrapped around the top jamb. So in reality, those two pieces covering the top jamb are completely separate, but they look like they’re wrapped around from the wall.
And that’s it! If you have experience hanging regular wallpaper, you shouldn’t have any problems installing grasscloth. I was pretty intimidated by it before I started, and even considered hiring out the process because I was so unsure of myself. But I’ve had plenty of experience installing regular wallpaper, so I decided to just go for it.
And now, in hindsight, I’m so glad I didn’t waste the money to hire out this process. It’s only slightly more challenging than installing regular wallpaper.
And the payoff is so worth it! There’s just nothing like grasscloth in my book. Now I need to get our router moved to another room so that it’s not distracting from my gorgeous walls. 😀

Addicted 2 Decorating is where I share my DIY and decorating journey as I remodel and decorate the 1948 fixer upper that my husband, Matt, and I bought in 2013. Matt has M.S. and is unable to do physical work, so I do the majority of the work on the house by myself. You can learn more about me here.